
Written by: Michael A. Stewart, Agri‑Solar Engineering Consultant. 12+ years designing and installing solar water pumping systems across the US lightning belt (Florida, Texas, Oklahoma, Midwest). Has diagnosed over 100 lightning‑related pump failures and designed protection systems for farms, ranches, and remote wells. Holds a Master’s in Energy Engineering (Delft University) and a certificate in Electrical Safety (NFPA 70E).
The Problem: The Silent Killer You Never See Coming
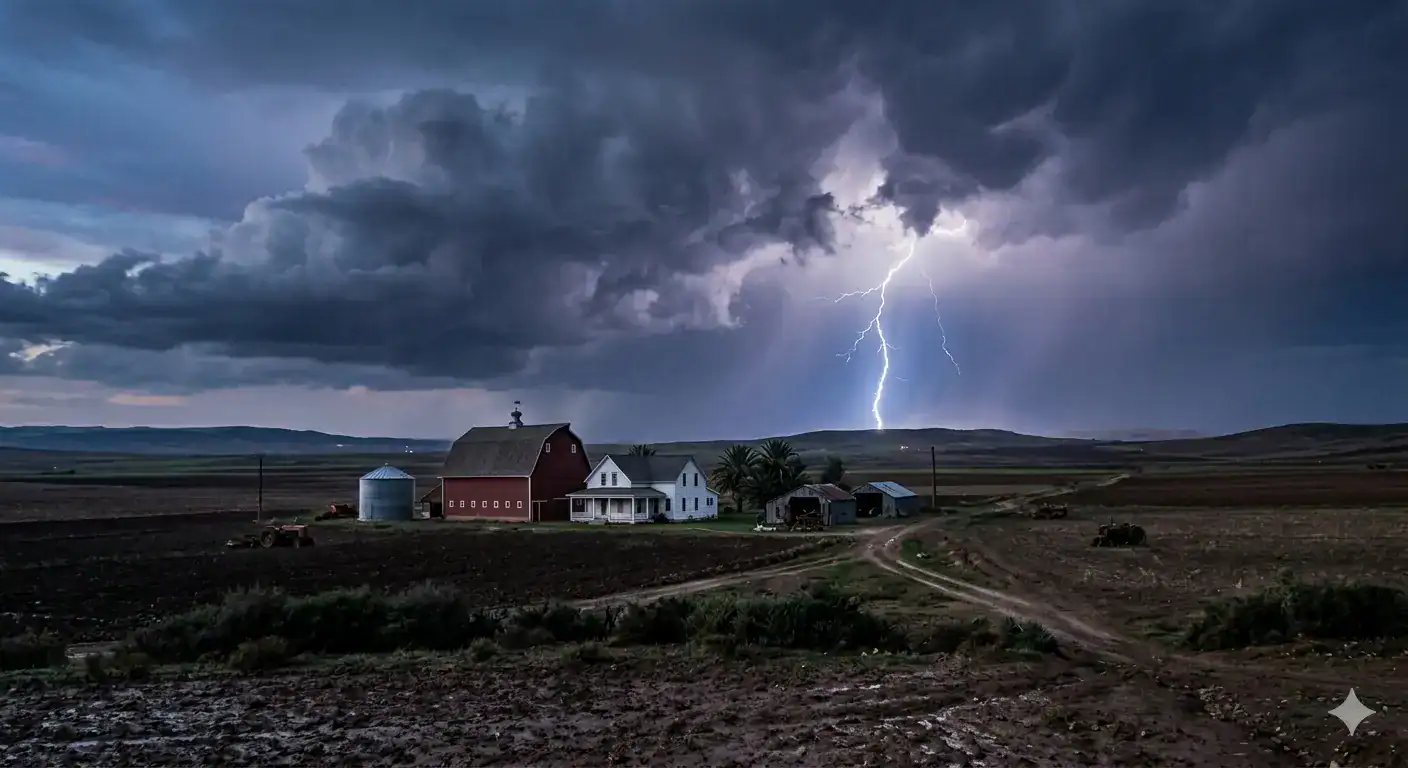
You wake up after a thunderstorm. The power was out for only an hour, but now your solar pump won’t start. The controller display is blank. You smell burning electronics. You open the controller box: blackened circuit board, swollen capacitors, melted wires.
There was no direct lightning strike to your property. The storm passed two miles away. Yet your $10,000+ solar pump system is destroyed.
Welcome to the reality of lightning damage.
Lightning does not need a direct hit to destroy your equipment. A strike within 500‑1,000 meters induces massive voltage spikes in long cables – your solar panel wiring, your pump cable, your sensor wires. These induced surges can reach thousands of volts. Your electronics are designed for 48‑600V. They die instantly.
Here is what lightning can do to your solar pump system:
| Component | Typical replacement cost | Susceptibility | Surge path |
|---|---|---|---|
| Controller (MPPT or PWM) | \$400‑1,500 | Very high | Any cable (panels, pump, sensors) |
| Pump motor (submersible) | \$1,200‑3,000 | High | Pump cable from wellhead |
| Inverter (AC system) | \$800‑2,000 | Very high | DC or AC lines |
| Flow meter / pressure sensor | \$150‑400 | Very high | Signal wires |
| Battery management system | \$200‑600 | High | Battery leads |
A single induced surge can destroy multiple components. Repairs often exceed $3,000‑5,000 – and you still have no water while waiting for parts.
The worst part? Most of this damage is preventable. Proper grounding and surge protection devices (SPDs) cost less than $500‑1,000 and can stop 95%+ of lightning‑induced surges.
This guide gives you a practical, code‑compliant system for protecting your solar water pump. No electrical engineering degree required – just the willingness to install a few critical components correctly.
The Solution: A 3‑Layer Protection System
Effective lightning protection uses three complementary layers:
| Layer | Purpose | Components | Cost (DIY) |
|---|---|---|---|
| 1 | Give lightning a safe path to earth | Ground rods, bonding conductors, grounding electrode system | \$100‑300 |
| 2 | Clamp induced surges before they reach electronics | Surge Protection Devices (SPD) – Type 1 and Type 2 | \$200‑600 |
| 3 | Isolate sensitive signal wires | Shielded cables, ferrite beads, optical isolation | \$50‑200 |
Section 1: Layer 1 – Grounding (The Foundation)
Grounding is the most important and most often botched part of lightning protection. A poor ground will not dissipate surge energy – it will let it travel through your equipment instead.
What Proper Grounding Looks Like
| Component | Requirement | Why |
|---|---|---|
| Ground rod | Copper‑clad steel, 5/8″ diameter, 8 ft length driven into soil | Dissipates lightning energy into earth |
| Ground rod resistance | <25 ohms (NEC 250.53) – ideally <10 ohms | Lower resistance = better energy dissipation |
| Grounding conductor | #6 AWG bare copper (or larger) | Carries surge current without melting |
| Bonding | All ground rods connected together (#6 AWG) | Prevents dangerous voltage differences |
| Equipment bonding | All metal enclosures, frames, well casing bonded to ground | Equalizes potential during strike |
Step‑by‑Step Grounding Installation
Step 1: Drive one ground rod at the pump house location.
- Choose a spot within 5 ft of the controller enclosure.
- Drive the rod vertically into moist soil (avoid rocky areas). Use a sledgehammer or a hammer drill with rod driver.
- Leave 4‑6 inches above ground to attach the grounding conductor.
Step 2: Measure ground resistance (or call an electrician).
- Use a ground resistance tester (clamp‑on or 3‑pole fall‑of‑potential). Many electrical contractors have one.
- Resistance must be <25 ohms. If >25 ohms:
- Drive a second rod at least 6 ft away from the first.
- Connect the two rods with #6 AWG bare copper.
- Remeasure – should now be <25 ohms.
Step 3: Connect the grounding conductor to the controller enclosure.
- Run #6 AWG bare copper from the ground rod to the controller’s ground lug.
- Use acorn clamps on the rod and a listed lug on the enclosure.
Step 4: Bond all metal components together.
- Well casing (if steel): Attach a #6 AWG copper wire to the casing using a pipe clamp. Connect to the same ground rod.
- Pressure tank (metal): Bond to ground.
- Solar panel frame: Run a #6 AWG wire from the frame to a separate ground rod at the array (or back to the pump house rod if distance <50 ft).
- Metal conduit: Bond to ground at each end.
Step 5: Install a grounding electrode conductor at the solar array.
- Same procedure: drive a rod, measure resistance, bond to panel frames and mounting structure.
Critical rule (NEC 250.50): All ground rods and metal parts must be bonded together. If you have separate rods at the array and the pump house, connect them with a buried #6 AWG copper wire.
Section 2: Layer 2 – Surge Protection Devices (SPDs)
SPDs (also called surge suppressors or lightning arrestors) clamp high‑voltage spikes to a safe level. They are not optional – they are required by NEC 2026 for solar PV systems on buildings and recommended for all agricultural systems.
Type 1 vs. Type 2 SPDs
| Type | Location | Response time | Survives direct strike? | Typical cost | Best for |
|---|---|---|---|---|---|
| Type 1 | At service entrance (main panel) | <5 nanoseconds | Yes (can handle 10/350 µs waveform) | \$200‑500 | Between solar array and controller (long cable runs) |
| Type 2 | At load side (subpanel, controller input) | <1 nanosecond | No (but handles 8/20 µs waveform) | \$100‑300 | Inside pump house, protecting controller and pump |
For solar pumps, you need both:
- Type 1 SPD at the point where DC cables enter the pump house (or at the array combiner box).
- Type 2 SPD at the controller input (DC side) and another at the controller output (pump side).
Selecting SPDs for Your Solar Pump
| System parameter | SPD rating |
|---|---|
| DC system voltage | SPD voltage rating 20‑30% higher than max PV voltage (e.g., 150 V DC system → 200 V SPD) |
| AC system (grid backup) | 120/240 V AC, 10‑20 kA surge current rating |
| Pump cable (long run) | Type 1 SPD with at least 20 kA surge current |
| Sensors (pressure, flow, dry‑run) | Low‑voltage signal SPD (12‑24 V) or optical isolator |
Installation Tips for SPDs
- Install SPD as close as possible to the controller – ideally within 1‑2 feet of wire length. Every extra foot of wire adds inductance, reducing protection.
- Use short, straight wires – no looping or coiling of SPD leads.
- Connect the SPD ground lead directly to the ground rod – not daisy‑chained through other equipment.
- For long cable runs (>50 m), install SPDs at both ends of the cable (array end and controller end).
Example SPD placement for a typical 5 HP DC system:
- At solar array combiner box: Type 1 SPD (600V DC, 20 kA)
- At pump house, DC input: Type 2 SPD (600V DC, 10 kA)
- At pump house, DC output to pump: Type 2 SPD (600V DC, 10 kA)
- For pressure sensor (24V DC): Small signal SPD (24V, 5 kA)
Section 3: Layer 3 – Cable Shielding & Signal Isolation
Long cables act as antennas for lightning‑induced surges. Shielded cable and isolation techniques can dramatically reduce surge coupling.
Shielded Cable for Pump and Sensor Wires
| Cable type | Shielding recommendation | Why |
|---|---|---|
| Submersible pump cable (AC or DC) | Use cable with foil or braid shield over the power conductors | Induced voltage can be reduced by 70‑90% |
| Sensor wires (flow, pressure, float switch) | Use twisted‑pair with overall shield | Differential signals reject common‑mode noise |
| PV cables (array to controller) | Metal conduit acts as shield – use EMT or rigid, not PVC | Conduit provides physical and EMI protection |
Grounding shielded cable: Connect the shield to ground at one end only (pump house end) to avoid ground loops.
Ferrite Cores (Common‑Mode Chokes)
Ferrite beads or split cores placed around cables near the controller suppress high‑frequency surges. They are inexpensive ($5‑20 each) and effective for induced surges.
Place ferrite cores on:
- DC power cables entering the controller (wrap 2‑4 turns through core)
- Sensor cables (as close to the controller as possible)
- Communication cables (if using remote monitoring)
Optical Isolation for Sensors
For critical sensors (dry‑run protection, pressure), use an optical isolator between the sensor and the controller. Surges cannot cross a light beam.
Cost: $50‑150 per sensor – worth it in high‑lightning areas (Florida, Texas, Oklahoma, Midwest).
Section 4: The Math – Cost of Protection vs. Cost of Damage
Let us compare two scenarios for a 5 HP solar pump system (total value ~$15,000) in a region with 20‑30 thunderstorm days per year (e.g., Kansas, Nebraska, Illinois).
Scenario 1: No Protection
| Year | Event | Damage cost |
|---|---|---|
| 2 | Induced surge from nearby strike | Controller destroyed: \$600 Pump motor damaged: \$1,500 Labor: \$800 Lost water (3 days): \$1,000 Total: \$3,900 |
| 5 | Another induced surge | Same again: \$3,900 |
| 8 | Direct strike to power line near well | Complete system replacement: \$12,000 |
| 10‑year total damage | \$19,800 | |
Scenario 2: Proper Grounding + SPDs + Shielded Cable
| Component | Cost (one time) |
|---|---|
| Ground rods (2 at pump house, 1 at array) + #6 wire | $150 |
| Type 1 SPD (array) | $250 |
| Type 2 SPD (controller input) | $150 |
| Type 2 SPD (controller output to pump) | $150 |
| Shielded pump cable (premium over standard) | $100 (extra for 100 ft) |
| Shielded sensor cable | $50 |
| Ferrite cores (3‑5) | $50 |
| Total protection investment | $900 |
| Year | Event | Damage cost (with protection) |
|---|---|---|
| 2 | Induced surge | SPDs sacrifice themselves ($150 replacement) – controller and pump survive. Cost: $150 |
| 5 | Another induced surge | Replace another SPD: $150 |
| 8 | Direct strike or severe surge | SPDs may fail, but likely protect downstream. Possibly $450 total over 10 years. |
| 10‑year total protection + replacements | $900 + $450 = $1,350 | |
Savings with protection: $19,800 – $1,350 = $18,450 over 10 years.
Comparison Table – Protection Strategy Costs
| Protection level | Upfront cost | 10‑year expected loss | Total cost | Best for |
|---|---|---|---|---|
| None | $0 | $15,000‑20,000 | $15,000‑20,000 | Never |
| Grounding only (no SPDs) | $150 | $10,000‑15,000 | $10,150‑15,150 | Not recommended |
| SPDs only (poor ground) | $400‑600 | $5,000‑8,000 | $5,400‑8,600 | Marginal |
| Grounding + SPDs + basic shielding | $900 | $500‑1,000 | $1,400‑1,900 | Recommended for most farms |
| Full system (all layers + optical isolation) | $1,500 | $200‑400 | $1,700‑1,900 | High‑lightning regions, mission‑critical water |
Verdict: For $900‑1,500 (6‑10% of system cost), you can reduce lightning‑related losses by 90‑95%. In a single moderate thunderstorm season, the investment pays for itself.
Section 5: Common Mistakes (and How to Avoid Them)
| Mistake | Why it’s wrong | Fix |
|---|---|---|
| PVC conduit for long cable runs | PVC provides no shielding against induced surges. | Use EMT (electrical metallic tubing) or rigid metal conduit. Bond conduit to ground at both ends. |
| Single ground rod with >25 ohms resistance | Surge energy cannot dissipate – travels through equipment. | Measure resistance. Add second rod 6‑10 ft away. |
| SPD installed with long wire leads | Lead inductance reduces clamping effectiveness. | Trim leads as short as possible (4‑6 inches). |
| Ground rod at array not bonded to pump house ground | Voltage difference between grounds can be thousands of volts – current flows through cables. | Connect all ground rods with #6 AWG bare copper. |
| Shielded cable grounded at both ends | Creates ground loop, may carry surge current. | Ground shield at one end only (pump house end). |
| No SPD on sensor wires | Sensors connect directly to controller’s delicate inputs. | Add low‑voltage signal SPD or optical isolator. |
| SPD installed but no visible indicator light | Many SPDs have a status indicator (green LED). If it goes out, SPD has failed open – no protection. | Check indicator monthly. Replace SPD when indicator is off. |
Section 6: Expert Tips – What Lightning Protection Pros Know
Tip 1: Install a dedicated ground rod for the solar array, even if the pump house rod is close.
Long DC cables can induce large voltage differences. A rod at the array (bonded back to the pump house rod) provides a low‑impedance path at the source of the surge.
Tip 2: Use exothermic (cadweld) connections for critical ground bonds.
Mechanical clamps corrode over time. Cadwelding (thermite welding) creates a permanent, corrosion‑free bond – especially important in wet or saline soils. Cost: $10‑20 per connection.
Tip 3: For submersible pumps, bond the well casing to ground, but never use the casing as the only ground electrode.
Steel casings make excellent ground rods, but NEC requires a supplemental electrode (driven rod) because casings can corrode or become disconnected.
Tip 4: Add a second Type 2 SPD inside the controller enclosure on the pump output side.
Most controllers have built‑in MOVs (metal oxide varistors), but they are low‑energy. Adding a high‑energy SPD right at the pump terminals stops surges from traveling down the well cable to the motor.
Tip 5: In high‑lightning regions (Florida, Texas, Oklahoma), replace SPDs every 5 years, even if the status light is still on.
Each surge degrades the MOVs. After 5‑10 moderate surges, the protection level drops significantly. Preemptive replacement is cheap insurance.
Tip 6: Document your ground resistance measurements.
Take a photo of the meter reading after installation and every 2 years. Rising resistance indicates soil drying, corrosion, or a broken connection.
Tip 7: If you have a remote monitoring system (cellular, WiFi), protect its antenna cable.
Antenna cables (coax) are direct lightning paths. Install an in‑line coax SPD (gas tube type) at the device and ground the antenna mast separately.
Conclusion
Lightning is unpredictable, but damage is not inevitable. A properly grounded solar pump system with surge protection devices (SPDs) and shielded cables will survive 95‑99% of induced surges – including strikes within a few hundred meters.
Your lightning protection action plan:
| Step | Action | Cost | Time |
|---|---|---|---|
| 1 | Drive ground rods at pump house (2 rods if resistance >25 ohms) | $100 | 2 hours |
| 2 | Bond all metal components (well casing, pressure tank, enclosures) | $50 | 1 hour |
| 3 | Install Type 1 SPD at solar array combiner box | $250 | 1 hour |
| 4 | Install Type 2 SPD at controller input (DC) | $150 | 30 min |
| 5 | Install Type 2 SPD at controller output (pump) | $150 | 30 min | 6 | Replace plastic conduit with EMT (if long run) or add ferrite cores | $100‑300 | 2‑4 hours |
| 7 | Test ground resistance and verify SPD status lights | $0 (borrow meter) | 30 min |
| Total | — | $800‑1,000 | 1‑2 days (DIY) |
Do not wait for the next thunderstorm. The cost of protection is a fraction of a single lightning‑induced failure. Install it now, and sleep soundly during summer storms.
Frequently Asked Questions (FAQ)
Q: Do I need lightning protection for a solar water pump if there are no tall trees nearby?
Yes, absolutely. Lightning protection for a solar water pump is not primarily about direct strikes – it is about induced surges. A lightning strike up to 1,000 meters (3,300 feet) away can induce thousands of volts into your long cable runs (solar DC cables, pump cable, sensor wires). These induced surges travel directly into your controller and pump motor, destroying electronics instantly. Even in open farmland with no tall structures, your solar array and well are vulnerable. Proper grounding and surge protection devices (SPDs) cost less than $1,000 and protect against 95%+ of these induced events. Do not skip them.
Q: What size ground rod do I need for a solar pump system?
For a solar water pump system, you need a copper‑clad steel ground rod, 5/8 inch (or 1/2 inch minimum) diameter, and at least 8 feet long. Drive it vertically into moist soil near the pump house. NEC 2026 requires ground rod resistance to be 25 ohms or less. If your soil is dry, rocky, or sandy, you may need a second rod driven at least 6 feet away and bonded to the first. Connect the rod to your controller enclosure and all metal components (well casing, pressure tank, panel frames) using #6 AWG bare copper wire. For the solar array, drive a separate ground rod bonded back to the pump house rod. Never rely on a single rod without testing resistance.
Q: Can I install surge protection myself, or do I need an electrician?
A farmer with basic electrical knowledge and comfort working with DC wiring can install surge protection devices (SPDs) and grounding for a solar pump system. The tasks include: driving ground rods, running #6 AWG copper wire, clamping wires to rods and lugs, and mounting SPDs in enclosures (they snap onto DIN rails or screw into boxes). However, you must follow NEC Article 250 (grounding) and Article 242 (surge protection). Critical steps: ensure all ground rods are bonded together, keep SPD leads as short as possible (<6 inches), and verify ground resistance (<25 ohms). If you are unsure about any step – especially measuring ground resistance or bonding the well casing – hire a licensed electrician. A $200‑400 service call is cheap compared to a $5,000 lightning‑induced failure. Many solar pump manufacturers also require professional installation of SPDs to maintain warranty.
This guide is based on NEC 2026 and lightning protection engineering principles. Last verified: June 17, 2026.