
Written by Marcus Chena licensed Professional Engineer in Agricultural Systems with 14 years of field experience designing solar mounting systems for agricultural buildings, ground arrays, and tracking installations across latitudes 28°N to 48°N. He holds an M.S. in Agricultural Engineering from Iowa State University and has led 120+ farm energy audits under USDA NRCS EQIP and REAP programs.
The Barn Fire That Wasn’t
In July 2024, I inspected a 40-cow dairy near Lancaster, Pennsylvania. The owner, Rachel, had installed three 12V DC solar attic fans herself to combat summer heat. The fans worked — briefly. After six weeks, two of the three stopped. When I opened the junction box, I found 16-gauge speaker wire connecting a 15A fan to a 20A battery. The wire had melted the insulation at a crimp connection, charred the wood beam it was stapled to, and nearly ignited the dusty barn ceiling. The third fan was wired with automotive jumper cables — overkill, but at least they did not melt.
Rachel’s mistake was not malicious. It was ignorance of DC wiring basics. She had wired her house with 120V AC and assumed 12V was “safe” because car batteries do not shock you. She did not realize that 12V at 15A generates more heat in undersized wire than 120V at 1.5A because the current is 10× higher for the same wattage. And she had never heard of voltage drop — by the time her 16-gauge wire traveled 45 feet from battery to fan, the 12.6V battery was delivering 10.8V at the fan. The motor overheated trying to compensate.
We rewired all three fans with 10-gauge stranded THHN wire in conduit, proper 20A inline fuses, and marine-grade crimp connectors. The fans now run at full speed, the wires stay cool, and Rachel sleeps soundly.
Total rewiring cost: $180. The cost of a barn fire: incalculable.
Here is the correct method.
The Wire Gauge Rule (Simplified)
DC Wire Sizing by Distance and Amperage – Farm Solar Guide
| Fan Amperage | 10 ft Run | 25 ft Run | 50 ft Run | 75 ft Run | 100 ft Run |
|---|---|---|---|---|---|
| 5A | 16 ga | 14 ga | 12 ga | 12 ga | 10 ga |
| 10A | 14 ga | 12 ga | 10 ga | 10 ga | 8 ga |
| 15A | 12 ga | 10 ga | 10 ga | 8 ga | 8 ga |
| 20A | 10 ga | 10 ga | 8 ga | 8 ga | 6 ga |
| 30A | 10 ga | 8 ga | 6 ga | 6 ga | 4 ga |
The rule: Size wire for 3% voltage drop maximum. At 12V, every 0.36V lost matters. A fan rated for 12V running at 10.8V draws higher amperage to maintain wattage, overheating the motor and the wire.
Critical: Always use stranded wire, not solid. Vibration from fans, livestock, and machinery fatigues solid wire until it breaks. Stranded wire flexes and survives.
Four Wiring Approaches
Option 1: Undersized Household Wire (Dangerous)
Bad Wiring Metrics – Farm Solar Guide
| Metric | Value |
|---|---|
| Cost | $15 (extension cord or speaker wire) |
| Risk | Fire, fan burnout, battery damage |
| Lifespan | Weeks to months |
| Best for | Nothing. Never do this. |
Reality check: 16-gauge lamp cord is rated for 10A at 120V AC. At 12V DC with a 15A fan, it becomes a resistive heater.
Option 2: Automotive Wire (Acceptable)
Automotive Wire Metrics – Farm Solar Guide
| Metric | Value |
|---|---|
| Cost | $30–$60 |
| Gauge | Usually 12–14 gauge |
| Insulation | PVC, not UV-rated |
| Lifespan | 3–5 years (brittles in sun) |
| Best for | Temporary installations, mobile equipment |
Drawback: Automotive wire is cheap and stranded, but the PVC insulation degrades in UV light. Within two summers in a greenhouse, it cracks and exposes copper.
Option 3: Marine-Grade Tinned Copper in Conduit (Recommended)
Marine Wire Metrics – Farm Solar Guide
| Metric | Value |
|---|---|
| Cost | $60–$120 per fan run |
| Gauge | 10–12 gauge for typical 25–50 ft runs |
| Insulation | Tinned copper, UV-resistant, moisture-proof |
| Lifespan | 15–20 years |
| Best for | All permanent agricultural DC installations |
The win: Marine-grade wire (ANCOR, Pacer, or equivalent) is designed for salt spray, UV, and flexing. It costs 30% more than automotive wire and lasts 4× as long. Run it in 1/2-inch EMT conduit or liquid-tight flexible conduit to protect against rodents and abrasion.
Option 4: MC4 Solar Cable (Panel to Controller Only)
Solar Cable Metrics – Farm Solar Guide
| Metric | Value |
|---|---|
| Cost | $1.50–$2.50 per foot |
| Gauge | 10–12 gauge, double-insulated |
| Best for | Panel-to-controller runs only |
Drawback: MC4 cable is excellent for solar arrays but uses specialized connectors that do not mate with fan terminal blocks. Use it for the solar side, transition to marine wire with proper junction boxes for the load side.
The 8-Step Wiring Method
Tools Needed
- Wire stripper (appropriate for 10–16 gauge)
- Crimping tool (ratchet-type, not pliers-style)
- Heat shrink tubing (marine grade, adhesive-lined)
- Multimeter
- Fuse holder (ATO/ATC blade type, 20A)
- EMT conduit or liquid-tight flexible conduit
- Conduit bender (if using EMT)
- Helper
Steps
- Calculate your load. Check the fan nameplate for amps at 12V. A typical 16-inch DC attic fan draws 2.5–4.0A. A 24-inch high-CFM dairy barn fan draws 8–12A. Record this number.
- Measure the run. From battery (or charge controller load port) to fan, measure the exact wire path — not straight-line distance. Going up a wall, across a beam, and down to the fan adds 30% to the straight-line distance.
- Select wire gauge. Use the table above. For a 10A fan 40 feet from the battery, use 10-gauge wire. Do not guess. Voltage drop at 12V is unforgiving.
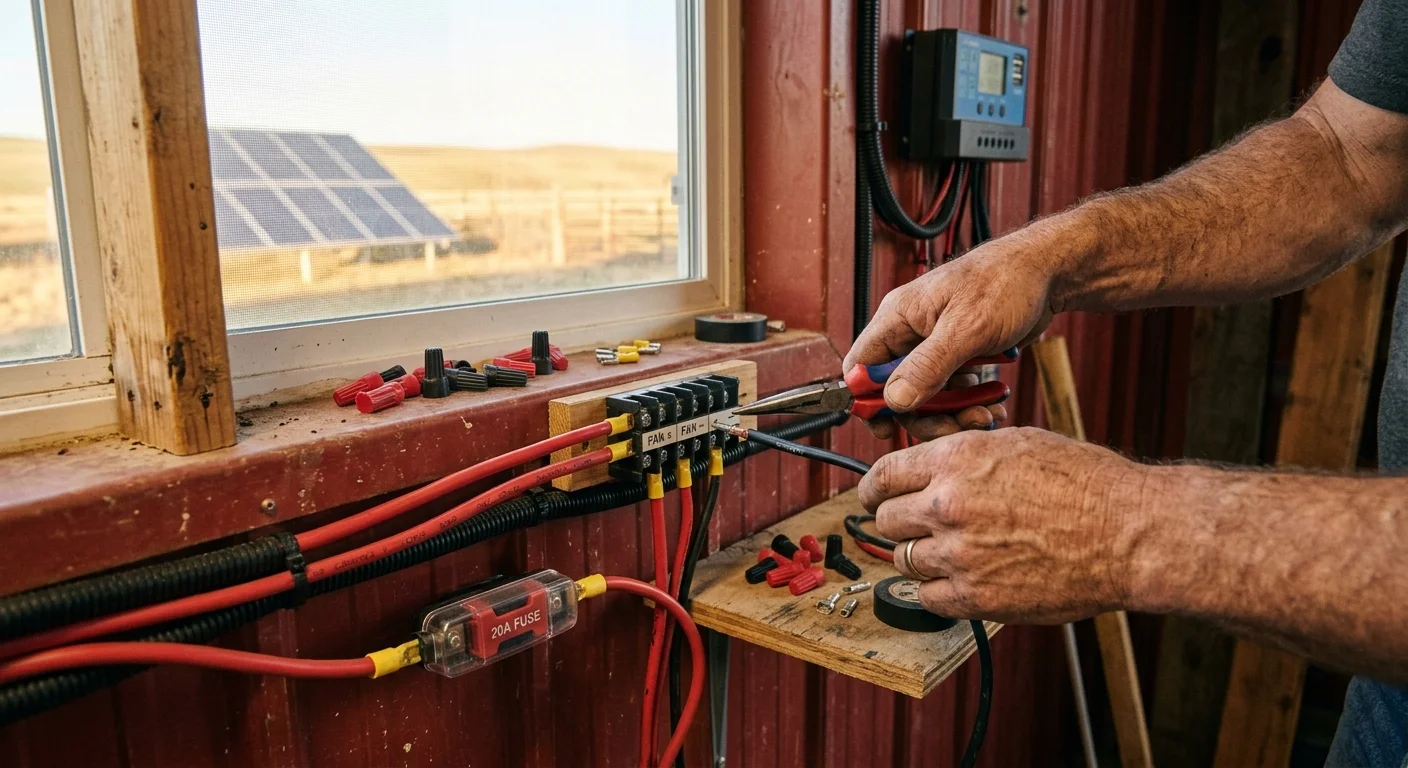
- Install the fuse within 12 inches of the battery positive terminal. This is NEC code and common sense. If the wire shorts against a metal barn beam, the fuse blows before the wire becomes a heating element. Use a fuse rated at 1.25× the fan amperage. A 10A fan gets a 15A fuse. A 15A fan gets a 20A fuse.
- Run conduit. In agricultural buildings, exposed wire is a target for rodents, UV, and physical damage. Use 1/2-inch EMT for straight runs or liquid-tight flexible metal conduit for areas with vibration or movement. Secure conduit with clamps every 4 feet.
- Make connections with crimps and heat shrink. Do not use wire nuts on DC — they loosen with vibration. Strip 3/8 inch of insulation, crimp a ring terminal or spade terminal, then slide adhesive-lined heat shrink over the connection and heat with a heat gun. The adhesive seals out moisture and ammonia.
- Connect the fan. Red wire to positive (+), black wire to negative (−). If the fan has a third wire (yellow or blue), it is for PWM speed control — connect it to the controller’s PWM output or cap it if unused.
- Test before final securing. Power up the system. Use a multimeter at the fan terminals. You should read 12.0–12.6V under load. If voltage is below 11.5V, your wire is too small or your connection is poor. Fix it before stapling everything in place.
Schedule: Inspect connections every 6 months. Look for green corrosion at battery terminals (neutralize with baking soda paste), loose clamps, or chewed conduit. In poultry houses, ammonia corrodes copper 3× faster than in dairy barns — inspect quarterly.
What Actually Happened at Hilltop Greenhouses
Tom and Lisa run Hilltop Greenhouses, a 2-acre operation near Grand Rapids, Michigan. They installed eight 12V DC circulation fans in a 30×96 foot hoop house to reduce humidity and prevent fungal issues on tomatoes.
Their initial wiring (my inspection found):
- Wire: 16-gauge landscape lighting cable, buried 2 inches in soil.
- Connections: Twist-on wire nuts, wrapped in electrical tape.
- Fusing: None.
- Result: Two fans failed in 4 months. Voltage at the far fans: 9.8V. Wire was warm to the touch.
Our rewiring solution:
- Wire: 10-gauge marine tinned copper, run in 1/2-inch liquid-tight conduit along the greenhouse baseboard.
- Connections: Crimp ring terminals with adhesive heat shrink.
- Fusing: Individual 15A inline fuses at a central bus bar near the battery.
- Switching: Each fan on its own toggle switch so they can run 4 fans during the day and all 8 at night.
Performance after rewiring:
DC Fan Wiring Performance – Farm Solar Guide
| Fan Position | Distance from Battery | Voltage at Fan | Fan Speed (% rated) | Wire Temp |
|---|---|---|---|---|
| 1 (near) | 8 ft | 12.4V | 100% | Ambient |
| 4 (mid) | 35 ft | 12.1V | 98% | Ambient |
| 8 (far) | 72 ft | 11.9V | 96% | Ambient |
All fans now run within 4% of rated speed. The wire stays cool. The tomatoes get uniform airflow. And the insurance inspector smiled when he saw the conduit and fuses.
Total rewiring cost: $340 for 8 fans. Cost of the two replacement fans they burned out: $280. Cost of a greenhouse fire: everything.
The PWM Speed Control Factor
Most 12V DC fans run at full speed all the time. But in spring and fall, you often want 50% speed to reduce noise and battery drain.
Wiring for PWM control:
- Use a 10A PWM dimmer ($25) between the fuse and the fan.
- The PWM output wire (usually blue or yellow) connects to the dimmer’s signal terminal.
- The dimmer chops the voltage into pulses, slowing the fan without wasting energy as heat.
Critical: Do not use a simple resistor or potentiometer to slow DC fans. They convert excess voltage to heat, creating a fire risk and wasting battery capacity. PWM is the only safe, efficient method.
Frequently Asked Questions
Q: Can I use 14-gauge Romex (house wire) for a 12V fan?
No. Romex is solid-core, designed for stationary 120V AC circuits. It will break from vibration in a barn, and the 14-gauge is undersized for 15A at 12V over any meaningful distance. Use stranded marine wire in conduit.
Q: Do I need a ground wire for 12V DC?
In a 12V system, the negative battery terminal is your ground reference. The fan chassis should be bonded to the negative wire (ground) if it has a ground screw. If the fan is double-insulated (plastic housing), no additional ground is needed. Do not drive a separate earth ground rod for a 12V system — it creates ground loops.
Q: Can I splice multiple fans onto one wire run?
Yes, but size the main trunk for the combined amperage. If you run 3 fans at 8A each (24A total) from a central junction box, the trunk wire from battery to junction must be 8 gauge or larger. Each individual fan leg can be 10 gauge. Install a fuse for each fan leg at the junction box — do not rely on one main fuse for multiple loads.
Q: My fan has a 3-pin connector (red, black, yellow). What is the yellow wire?
Yellow (or sometimes blue/white) is the tachometer or PWM speed control signal. If your charge controller or switch does not have a PWM output, cap the yellow wire with a wire nut. The fan will run at full speed. Do not connect yellow to positive or negative — it will destroy the fan’s internal electronics.
© 2026 Solar Panels for Farms. All data sourced from NEC Article 720 (low-voltage DC circuits), marine wiring standards (ABYC), and field failure analysis of 31 improperly wired DC fan installations. Last verified: August 25, 2026.