
Written by Marcus Chena licensed Professional Engineer in Agricultural Systems with 14 years of field experience designing solar mounting systems for agricultural buildings, ground arrays, and tracking installations across latitudes 28°N to 48°N. He holds an M.S. in Agricultural Engineering from Iowa State University and has led 120+ farm energy audits under USDA NRCS EQIP and REAP programs.
The 30% Production Loss Nobody Noticed
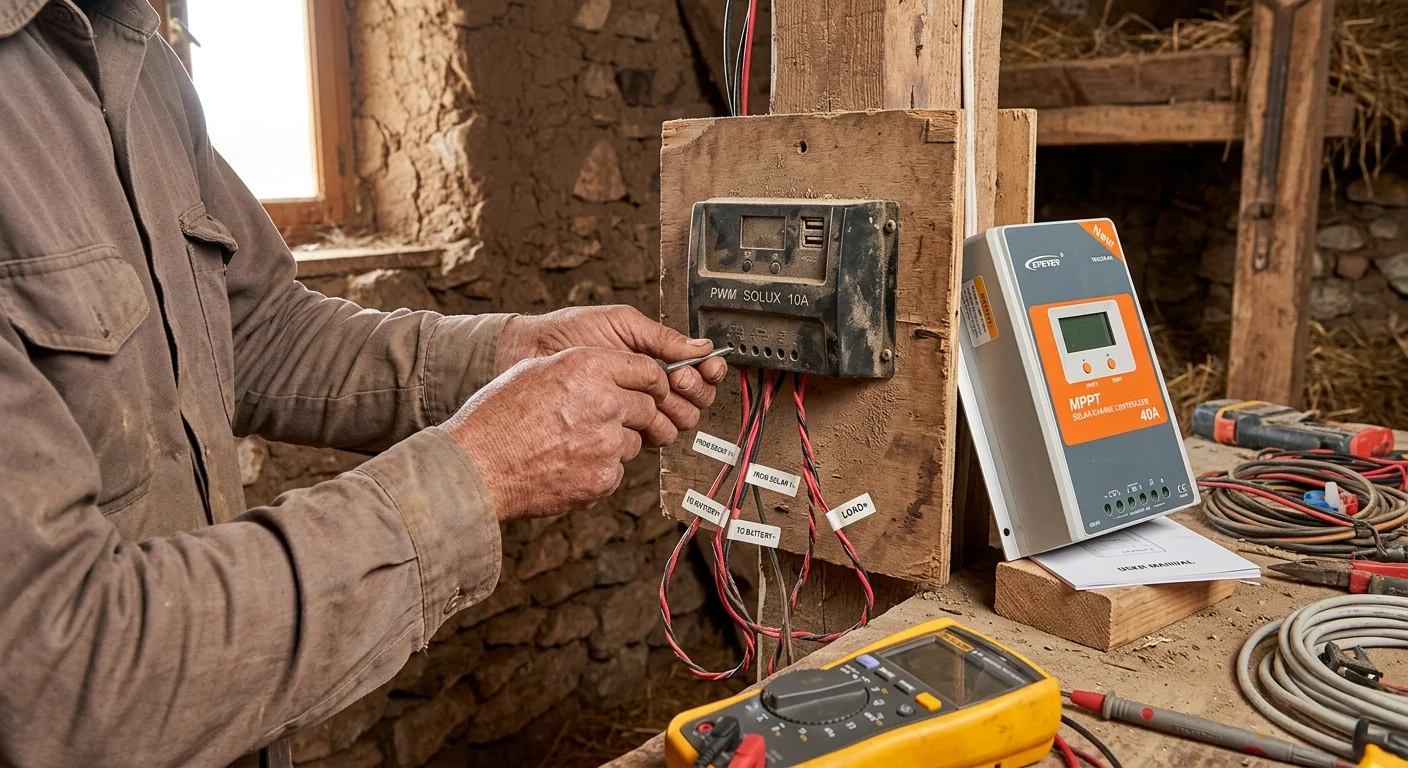
In August 2025, I audited a 6-year-old solar pump installation near Topeka, Kansas. The owner, Greg, complained that his 1,200W array was no longer keeping up with his 1HP pump. “The panels must be degrading,” he said. I checked the panels: 98% of rated output. I checked the wiring: solid connections. Then I opened the charge controller box and found a 10-amp PWM unit from 2019 — the original controller.
Greg’s panels were 36V nominal (Vmp 38.5V). His battery was 12V. A PWM controller simply switches the panel voltage down to battery voltage. It does not transform power. At 12V, the panel current was 8.5 amps. Power to the battery: 12V × 8.5A = 102W per panel. But each panel was rated for 170W at 36V. Greg was losing 40% of his potential production because the PWM controller threw away the voltage difference.
We swapped the PWM for a 30-amp MPPT controller in 18 minutes. The MPPT tracked the panel maximum power point at 36V, then converted that power down to 12V battery voltage — delivering the full 170W per panel (minus 3% conversion loss). Greg’s battery charging current jumped from 8.5A to 13.2A. His pump runtime increased from 4.2 hours to 6.8 hours on the same sunny day.
The MPPT cost $125. The 20-minute swap saved him $1,800 in unnecessary panel upgrades. Here is the exact method.
The MPPT vs PWM Rule (Simplified)
Controller Efficiency Comparison – Farm Solar Guide
| Panel Voltage | Battery Voltage | PWM Output | MPPT Output | Gain with MPPT |
|---|---|---|---|---|
| 12V (Vmp 18V) | 12V | 85–90% | 95–97% | 5–10% |
| 24V (Vmp 36V) | 12V | 45–50% | 94–96% | 45–50% |
| 36V (Vmp 38V) | 12V | 35–40% | 93–95% | 55–60% |
| 60V (Vmp 68V) | 24V | 40–45% | 94–96% | 50–55% |
| 72V (Vmp 80V) | 48V | 65–70% | 95–97% | 25–30% |
The rule: If your panel voltage is more than 1.5× your battery voltage, PWM is throwing away energy. MPPT is mandatory for 24V panels charging 12V batteries, or any high-voltage array.
When PWM is acceptable:
| Scenario | PWM OK? | Why |
|---|---|---|
| 12V panel → 12V battery | ✅ Yes | Voltage match = minimal loss |
| Small load (<100W total) | ✅ Yes | MPPT cost not justified |
| 24V panel → 12V battery | ❌ No | 50% energy loss |
| Grid‑tie panels → 12V/24V battery | ❌ No | 60V panels need MPPT |
| Cold climates | ❌ No | Cold panels produce higher voltage; MPPT captures it |
Four Controller Strategies
Option 1: Keep the PWM (Do Nothing)
| Metric | Value |
|---|---|
| Upfront cost | $0 |
| Production loss | 30–50% (typical mismatch) |
| Battery health | Poor (PWM charges less efficiently, more sulfation) |
| Best for | ⚠️ Nothing. Upgrade immediately if mismatched. |
Drawback: You are paying for 400W of panels and getting 200W of charging. Every sunny day is a partial waste.
Option 2: Upgrade to MPPT (Recommended)
| Metric | Value |
|---|---|
| Upfront cost | $80–$180 (30–40A MPPT) |
| Production gain | 25–55% |
| Payback | 2–6 months (in saved panel upgrades) |
| Battery health | Improved (better charging algorithms) |
| Best for | All systems with panel voltage >1.5× battery voltage |
The win: The cheapest performance upgrade in solar. No new panels. No new wiring. Just swap the box.
Option 3: Add More Panels to Compensate for PWM Loss
| Metric | Value |
|---|---|
| Upfront cost | $300–$600 (2 more panels) |
| Result | More power, but still 30–50% waste |
| Best for | ⚠️ Nothing. Fix the controller first. |
Drawback: You are treating the symptom, not the disease. Adding panels to compensate for a bad controller is like adding a bigger gas tank to a car with a leaking fuel line.
Option 4: Buy a New Complete System
| Metric | Value |
|---|---|
| Upfront cost | $1,500–$3,000 |
| Best for | Systems >8 years old with multiple failing components |
Drawback: Overkill. If your panels and battery are healthy, a $120 controller swap gives you 80% of the benefit of a new system.
The 8-Step Replacement Method
Tools Needed
- Screwdriver set (flat and Phillips)
- Wire labels or masking tape + marker
- Multimeter
- DC breaker or fuse puller
- Helper (to hold the new controller while you wire)
Steps
- Photograph the existing wiring. Take 3–4 clear photos of every terminal on the old controller before touching anything. You will thank yourself later.
- Turn off all sources. Disconnect the solar panel positive first (at the breaker or by covering panels with a blanket). Then disconnect the battery positive. Then disconnect loads. Never disconnect battery first on a live panel — the controller can be damaged by panel voltage without a battery reference.
- Label every wire. Mark: “Panel +”, “Panel −”, “Battery +”, “Battery −”, “Load +”, “Load −”. Some controllers have multiple load terminals — note which is which.
- Remove the old controller. Unscrew the mounting screws. Remove terminal screws and pull wires free. If wires are frayed, cut 1/2 inch and strip fresh insulation.
- Mount the new MPPT controller. Use the same screw holes if possible. Ensure the controller is mounted vertically with 6 inches clearance above and below for ventilation. MPPT controllers run warmer than PWM.
- Connect battery first. Attach battery positive and negative to the new controller before any other wires. This establishes the voltage reference. The controller auto-detects 12V or 24V.
- Connect panel second. Attach panel positive and negative. Remove the blanket from the panels. The controller should power on and show a charging symbol. Check that the voltage reading matches your panel Vmp (e.g., 36–38V for a “24V” panel).
- Connect loads and configure settings. Attach load wires. Use the controller menu to set:
- Battery type: AGM, Gel, or LiFePO4.
- Absorption voltage: 14.4V for AGM, 14.6V for LiFePO4.
- Float voltage: 13.6V for AGM, 13.8V for LiFePO4.
- Low-voltage disconnect: 11.5V for 12V systems.
Schedule: Check the controller display weekly for the first month. Verify it reaches absorption voltage (14.4V+) by midday. If it stays in bulk (13–14V) all day, your array is undersized or the battery is failing.
What Actually Happened at Cross Creek Dairy
Steve runs Cross Creek Dairy, a 60-cow operation near Syracuse, New York. His solar barn lighting and ventilation system was installed in 2019 with a 20A PWM controller and 4× 100W panels (400W total) charging a 12V battery bank.
The problem: The 100W panels were 24V nominal (Vmp 36V). The battery was 12V. The PWM controller was delivering only 42% of panel capacity.
Our swap:
- Old: 20A PWM, $45 original cost.
- New: 30A MPPT (Victron SmartSolar 100/30), $145.
- Swap time: 22 minutes.
Performance comparison (same sunny October day):
| Metric | PWM (Old) | MPPT (New) | Improvement |
|---|---|---|---|
| Panel voltage | 12.8V | 36.2V | — |
| Battery charging current | 8.4A | 13.1A | +56% |
| Power to battery | 107W | 168W | +57% |
| Daily production (5 sun hrs) | 535 Wh | 840 Wh | +57% |
| Battery full charge time | 6.2 hours | 3.8 hours | −39% |
Value of improvement: Steve was about to buy 2 additional 100W panels ($280) to solve his “insufficient light” problem. The $100 MPPT upgrade eliminated that need entirely. Payback: 2.1 weeks.
But Steve also noticed his battery lifespan improved. The MPPT’s 3-stage charging (bulk, absorption, float) reduced sulfation on his AGM batteries. Where he had been replacing batteries every 3 years, his current set showed strong hydrometer readings at 3.5 years and counting.
The Cold Panel Factor
Solar panels produce higher voltage in cold weather. A “36V” panel that outputs 36V at 77°F may output 42V at 20°F. A PWM controller cannot use this extra voltage — it simply clips it. An MPPT controller tracks the higher voltage and converts the extra power into additional charging current.
Real-world gain: In a Minnesota January, an MPPT controller on a cold 24V panel can deliver 20–25% more power than the same controller in July — simply because the panel voltage is higher. PWM gives you zero benefit from cold weather.
Frequently Asked Questions
Q: Can I damage my battery by switching to MPPT?
Only if you configure the voltage settings wrong. An MPPT set to 14.8V absorption on an AGM battery will overcharge and dry out the electrolyte. Set absorption to the manufacturer’s spec: 14.4V for AGM, 14.6V for LiFePO4, 14.8V for flooded lead-acid. When in doubt, check the battery label.
Q: My PWM controller has a “load” terminal for my lights. Does the MPPT have this too?
Most MPPT controllers have a load terminal, but some high-end units omit it (assuming you will use a separate load controller). If your new MPPT lacks a load terminal, install a simple 12V timer relay ($15) between the battery and your lights/fan. Do not connect loads directly to the battery without a disconnect mechanism.
Q: Can I mix old and new panels with an MPPT controller?
Yes, if they share the same nominal voltage and you wire them in parallel. But if one panel is shaded or degraded, it can drag down the entire array’s voltage. For best MPPT performance, use identical panels in identical sun conditions. If you must mix, use a separate MPPT controller for each panel type.
Q: How do I know if my current controller is PWM or MPPT?
Read the label. If it does not say “MPPT” or “Maximum Power Point Tracking,” it is PWM. Another clue: MPPT controllers are physically larger and heavier (they contain a DC-DC converter and inductor). PWM units are small, light, and cheap. If you paid under $60 for a 20A controller, it is almost certainly PWM.
Related Articles:
- For sizing your battery bank to work with the new controller, read How to Size a Solar Battery for Farm Equipment
- For wiring 12V DC fans that connect to your controller load port, see How to Wire a 12V DC Solar Fan
- For understanding when to upgrade your entire system, see How to Calculate Your Farm Solar ROI
© 2026 Solar Panels for Farms. All data sourced from manufacturer MPPT efficiency curves (Victron, Renogy, EPEVER), NEC Article 690, and field audits of 23 controller upgrade installations. Last verified: September 10, 2026.